
From Prototype to Production: A Plain-English Guide (2026)
Here's the short answer on going from prototype to production: you take the working model you can hold in your hand and turn it into a real product a factory can make hundreds or thousands of times, at the same quality, every time. That happens in four moves, get the design production-ready, decide whether you need tooling, run a small first batch to prove it works, then scale up.
The part nobody warns you about? A working prototype feels like you're almost done. You're not. It's a huge milestone, but it's closer to the halfway mark than the finish line. This guide walks you through the rest in plain English, no engineering degree needed. We'll cover realistic timelines, honest tooling costs, the design changes that surprise almost every first-timer, and how to do it all without ordering 10,000 units you don't need yet. If you're jumping ahead, the sections on how long it really takes and what it costs are where most people want to land first.
This guide picks up where two of our others leave off. If you're still building your first model, start with how to make a prototype of your invention. And if you want the whole idea-to-shelf roadmap, our guide on how to get your invention made lays out all seven stages. Getting from prototype to production is really just the back half of that journey, the part where an idea becomes something you can actually sell.
What "Prototype to Production" Actually Means
A prototype proves your idea works. Production proves it can be made over and over, affordably, without falling apart or looking different every time. Those sound similar. They're actually two very different problems, and the gap between them is where most first-time timelines quietly slip.
Think of it this way. Your prototype answered the question "does this thing do what I hoped?" Production has to answer a harder one: "can this be made a thousand times without changing, at a price that still leaves me a profit?" Everything in this guide is about crossing that gap without wasting money.
The good news is you don't have to figure it out alone. This is exactly what a manufacturer does all day. In fact, the single best time to bring one in is right now, while the design can still change cheaply, not after you've frozen everything. In our guide on getting an invention made, we call this whole back half of the journey the "Source, Sign-off, Scale" stages of Meco's First-Run Framework. This post zooms in on those three moves.
The 4 Steps from Prototype to Production
The path is rarely a perfect straight line, but almost every physical product moves through the same four steps. Knowing what each step is for keeps you from skipping the ones that come back to bite you later.
| Step | What it's for | Typical quantity | How it's usually made | What trips people up |
|---|---|---|---|---|
| 1. Production-ready prototype | Prove it can be made, not just built by hand once | 1 to 10 | 3D printing, CNC machining | Design still built to "just work," not to be repeated |
| 2. The tooling decision | Pick the real process and decide if you need a mold yet | Planning stage | DFM review and quoting | Buying an expensive mold too early, or too late |
| 3. Small first batch | Get real, sellable units and catch problems early | 10 to a few thousand | Machining, soft tooling, short-run molding | Skipping it and finding defects at full scale |
| 4. Full production | Repeatable output at the lowest cost per unit | Thousands to millions | Hard tooling, casting, injection molding | Quality drifting, no plan to check quality |
Step 1: Make your prototype production-ready
This is the last version you build just to learn, and the first one you build with the factory in mind. Use materials and shapes close to what the real product will use, so the lessons actually carry forward. The mindset shifts from "make it work" to "make it makeable."
Step 2: Decide if you need tooling
This is where a good manufacturer earns their keep, and where you decide whether your first batch is machined one part at a time or made from a mold. It's a bigger decision than it sounds, and we've given it its own section below because it drives your whole budget.
Step 3: Run a small first batch
A small first batch, often called a pilot run or bridge production, gets you real, sellable product while you make sure the full process works. It's the step first-timers skip most, and the one that catches problems before they multiply into a warehouse full of unsellable stock.
Step 4: Scale to full production
Only once that small batch comes out clean do you scale up. Now the focus turns to cost per unit and keeping quality consistent, which is where understanding the real cost of getting a part made pays off.
Why Your Prototype Won't Survive Production (The Redesign Trap)
Here's the truth most guides tiptoe around: the part that works beautifully as a prototype often can't be manufactured as-is. And discovering that late is the number-one reason a product that "works" still takes months to actually ship.
Let me make it concrete. Say you 3D-printed a plastic bracket and it's perfect. But one wall is 3mm thick and another is 8mm, because you weren't thinking about manufacturing when you drew it, you were thinking about making it work. A 3D printer doesn't care; it just builds up layers. But the moment you try to injection-mold that same part, those thick and thin sections cool at different speeds. The thick part shrinks as it cools and pulls the surface inward, leaving a dented "sink mark." The part warps. It fails.
The fix is simple once you know it: redesign to a uniform 3mm wall and add ribs for strength where the thick section used to be. Same function, same look, but now it molds clean, part after part. That's the redesign trap in a nutshell, small changes that are cheap to make on a screen and expensive to discover after you've cut a mold.
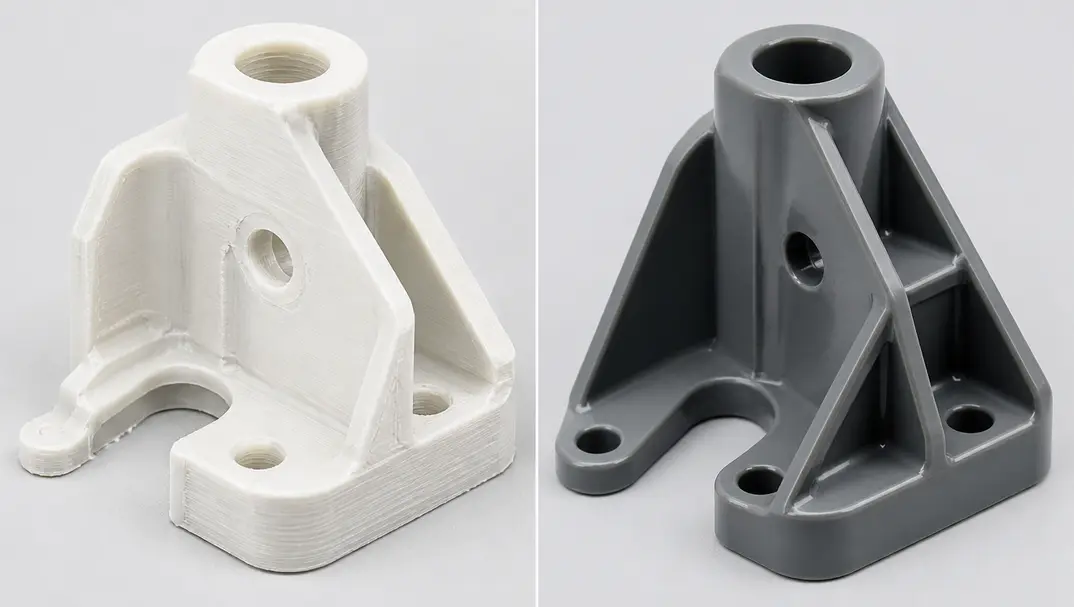
The design changes that surprise almost everyone
- Draft angles: Molded and cast parts need slightly tapered walls so the part can pop out of the tool. Prototypes almost never have them.
- Even wall thickness: Thick and thin sections in the same part cause warping and those ugly dents called sink marks.
- Parting lines: Every mold has to split somewhere. Where it splits affects how your product looks and works, so it gets planned on purpose.
- Splitting or combining parts: One printed piece might need to become two molded pieces, or several prototype pieces might merge into one.
- Realistic tolerances: You can hand-fit a prototype. Production needs measurements the machine can actually hit every single time.
Which rules apply depends on what your product is made of. If it's headed toward metal, the custom casting process has its own draft and gating rules. If it's molded plastic, injection molding brings wall-thickness and shrinkage into play. This is exactly what a design-for-manufacturing (DFM) review is for, an engineer looks at your design and flags all of this before you spend a cent on tooling. The good news is these fixes almost always make your part cheaper to build, not more expensive.
Do You Even Need Tooling Yet? The Big Money Decision
Tooling, meaning the custom mold or die that shapes your part, is usually the single biggest cost in reaching production. So the real question isn't "how do I get tooling," it's "do I need it yet?" The answer decides your whole budget.
The rule of thumb is simple. At small quantities, you skip tooling and just machine or 3D-print each part. As your numbers climb, a mold starts to pay for itself because each part gets much cheaper to make. Between those two extremes sits a middle option a lot of first-timers have never heard of: soft tooling.
Soft tooling (also called bridge tooling) is a mold made from aluminum instead of hardened steel. It costs a fraction of a full production mold, comes together faster, and lets you make real molded parts in the real material, so you can prove the design at a few hundred or few thousand units before betting big money on the expensive steel version. It's the bridge between "printing every part" and "committing to full production tooling," which is exactly why it's called bridge tooling.
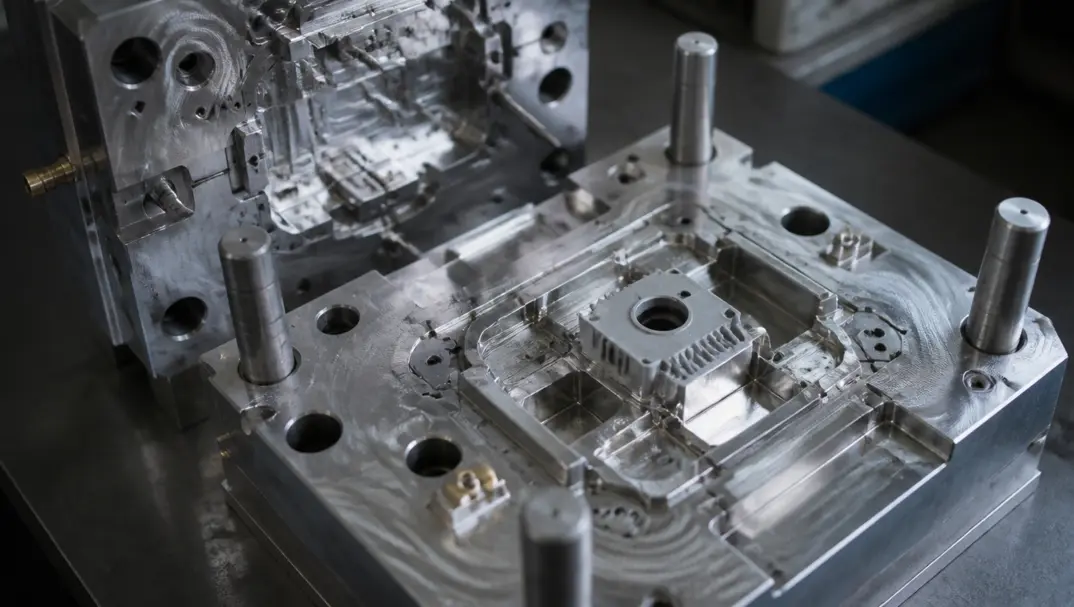
| Your approach | Best when you need | Rough tooling cost | Why you'd pick it | The trade-off |
|---|---|---|---|---|
| Machine or 3D-print each part | 10 to a few hundred | None | No mold to wait for, easy to change the design | Each part costs more |
| Soft / bridge tooling (aluminum) | Hundreds to a few thousand | About $2,000 to $8,000 | Real molded parts, faster and cheaper to make the mold | The mold wears out sooner than steel |
| Soft-steel production mold | Thousands | About $8,000 to $25,000 | A good balance of mold life and cost | Bigger upfront commitment |
| Hard-steel production mold | Tens of thousands and up | About $20,000 to $80,000+ | Lowest cost per part at big volumes | Most expensive to buy, hardest to change later |
Those are typical public ranges for plastic injection tooling, and they shift with the size and complexity of your part. Casting molds follow different numbers. But here's the point worth tattooing on your brain as a first-timer: you do not have to buy the expensive mold first. Because Meco has no minimum order quantity, you can start with 10 pieces, prove the design is right, and only step up to tooling once your sales actually justify it. That single fact removes most of the financial fear from this whole stage.
How Long Does It Really Take? (The Honest Answer)
Realistically, a simple single-part product can reach production in a few weeks, while a complex product with lots of parts often takes several months to well over a year. Anyone who promises you a complicated consumer product in "four months" is either cutting corners or setting you up to be disappointed. It's worth being blunt about that, because unrealistic timelines are how first-timers get burned.
The reason you can't just rush it is tooling. Cutting a mold is a physical process with real steps that take real time, and no amount of hustle shrinks it below a certain floor. Here's what the pieces actually add up to.
| Step | How long it usually takes |
|---|---|
| Quote and DFM feedback | Under 24 hours to a few days |
| Prototype parts | 1 to 2 weeks (3D-printed, often 3 to 7 days) |
| Injection-mold tooling | 2 to 8 weeks |
| Casting tooling | 4 to 14 weeks |
| Forging dies | 6 to 12 weeks |
| Sample approval and inspection | 1 to 2 weeks |
| Overall (simple single part) | 2 to 8 weeks |
| Overall (complex multi-part product) | Several months up to 12 to 18 months |
Why "four months" is usually a red flag for complex products
If your product has a dozen parts, needs safety approvals, and hasn't been tested for durability yet, the tooling alone can eat two to three months. Add design fixes, a sample round, and a pilot batch, and the real number climbs. A partner who promises the moon on day one, before they've even seen your files, is telling you what you want to hear, not what's true. The honest ones give you a range and explain what would move it. That's the kind of straight talk that saves you from a blown launch date.
Two tricks the products that ship on time all use. First, run steps side by side wherever you can, cut the tooling for one part while you finalize another, instead of doing everything in single file. Second, treat the small first batch as part of the plan, not an optional delay. It feels like it's slowing you down. It's actually insurance against a far bigger delay later.
How Much Does It Cost to Go from Prototype to Production?
The cost breaks into three buckets: the engineering and design work, the tooling, and the per-unit cost of actually making your product. Tooling is usually the big one-time expense, and your per-unit cost drops as you make more, which is the whole reason molds exist in the first place.
Rather than repeat a full pricing breakdown here, we've got a dedicated guide on how much it costs to get a metal part made that digs into every number. But there's one money-saving move worth calling out right now: getting DFM feedback early typically trims 15 to 30 percent off your production cost. That's not because anyone's cutting corners. It's because an experienced engineer spots the one feature that's quietly doubling your cost and suggests a simpler version that does the exact same job.
This is also where the no-minimum-order approach protects your wallet. Instead of guessing at demand and ordering a huge first run to "get the price down," you can start small, see what really sells, and scale into the cheaper per-unit pricing once you have actual sales behind you. You get the learning without the financial gamble.
The Hidden Steps First-Timers Always Miss
Beyond design and tooling, a few steps sneak up on almost everyone making their first product, usually at the worst possible moment. Planning for them now is far cheaper than tripping over them at launch.
- Certifications and safety approvals. Lots of products need a safety or regulatory sign-off before you're even allowed to sell them. Find out what yours needs early. We've seen founders finish a whole production run only to learn they needed a certificate they never planned for, an expensive way to learn the lesson.
- A complete parts list (bill of materials). Every component, material, and finish, written down clearly. Vague entries like "a screw" or "plastic" lead to wrong quotes and delays. The clearer your list, the more accurate your quote.
- A plan to check quality. As you make more units, you need a way to confirm they're all coming out right, not just the first one. This is where working with an IATF 16949:2016 certified manufacturer helps, quality checks are built into every stage from raw material to the finished product, so consistency isn't left to luck.
- An honest guess at demand. Order too few and each unit costs more; order too many and your cash is stuck in a warehouse. Starting small and scaling with real sales is how you sidestep both.
One Partner vs. Juggling Five Vendors
Here's the trap that quietly wrecks first-time budgets: hiring a separate company for the prototype, another for the mold, another for the plastic parts, another for the metal parts, and yet another for assembly. Each one seems reasonable on its own. Together they become a coordination nightmare, and when something doesn't fit, every vendor points at the other one while you eat the cost of the fix.
There's also a quieter problem. When you're a small order spread across five suppliers, you're nobody's priority. Bigger clients jump the queue, and your project stalls while you wait.
A manufacturer that owns its own factories solves both problems by putting design, tooling, parts, assembly, and delivery under one roof and one point of accountability. If something needs fixing, there's no finger-pointing, it's on them. That's the heart of Meco's whole product manufacturing approach: you own the idea, one partner carries it from prototype all the way to a finished, packaged product on your customer's doorstep. And if you're nervous about sharing your design, IP protection and NDAs come standard, we sign before we start, and your idea stays yours.
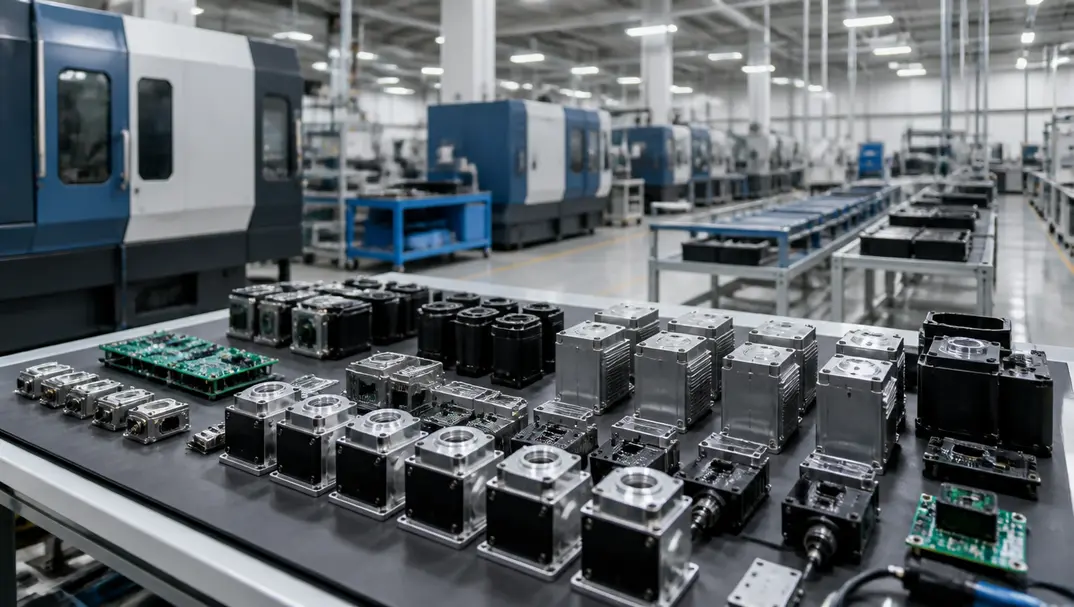
In our experience, the biggest money-saver for a first-time product creator isn't finding a cheaper factory. It's having one team that catches design problems before they become production problems, and that will run a small batch instead of forcing a giant one. If you want to understand how this business relationship works before your first call, our explainer on what contract manufacturing is is a good five-minute read.
Your Simple Prototype-to-Production Checklist
If you take one thing away from this guide, let it be the order of operations. Doing these in sequence is what keeps the whole thing affordable.
- Make your prototype production-ready, real materials, real shapes, factory in mind.
- Send your files to a manufacturer and get DFM feedback before you commit to anything.
- Decide with them whether to machine your first batch or invest in soft tooling.
- Run a small first batch and actually inspect it.
- Sort out any certifications your product needs to be sold.
- Approve a sample, then scale up into full production and cheaper per-unit pricing.
None of these steps require a manufacturing background. They just require doing them in the right order, and picking a partner who'll walk them with you instead of handing you a price and disappearing.
Frequently Asked Questions About Prototype to Production
How do you go from prototype to production?
You move through four steps: make your prototype production-ready using near-final materials, get design-for-manufacturing (DFM) feedback and decide whether you need tooling, run a small first batch to prove the process works, then scale to full production. The key shift is redesigning the part so it can be made over and over, not just built once by hand. Bringing in a manufacturer during the design stage, rather than after, is what prevents expensive redesigns later.
How long does it take to go from prototype to production?
A simple single-part product can reach production in about 2 to 8 weeks. A complex product with many parts and safety approvals often takes several months up to 12 to 18 months. The biggest factor is tooling lead time, which runs roughly 2 to 8 weeks for injection molds and 4 to 14 weeks for casting tooling. Be wary of any partner promising a complex product in a few months before they've even seen your files.
Do I need tooling for my first production run?
Not always. For small quantities, machining or 3D-printing each part avoids tooling costs entirely and keeps your design easy to change. As your numbers grow, a mold lowers the cost per part enough to pay for itself. A popular middle path is soft or bridge tooling, an aluminum mold that costs around $2,000 to $8,000 and lets you make real molded parts before investing in an expensive steel production mold.
Why does my prototype work but production fails?
Prototypes are usually built to prove a product works, not to be made repeatedly. Features that are fine when 3D-printed, like sharp corners, uneven wall thickness, and no draft angles, can be impossible to mold or cast consistently. This is the redesign trap. A DFM review adds draft angles, evens out wall thickness, plans where the mold splits, and sets realistic tolerances so the part comes out right every time, and those fixes usually make it cheaper to build too.
What is bridge production?
Bridge production is a small run, often 10 to a few thousand units, made before you commit to full mass production. It usually uses soft aluminum tooling and gets you real, sellable product quickly while you validate the full process. It's one of the smartest ways to catch problems before they multiply at scale, and also one of the most commonly skipped steps by first-time product creators.
Can I make a small first batch with no minimum order?
Yes. Meco has no minimum order quantity and can scale from 10 pieces up to 10 million or more. That means you can start with a small, validated batch, prove your design and that people actually want it, then step up to tooling and bigger volumes only when the numbers justify it, instead of gambling on a huge first order.
What's the difference between a prototype and a production part?
A prototype proves an idea works and is often hand-built or 3D-printed as a one-off. A production part is engineered to be made repeatedly, to the same spec, at a cost that still leaves you a profit. The differences show up in materials, tolerances, shape, and the process used to make them, which is why the two often need slightly different designs of the very same part.
What do I need to send a manufacturer to get started?
At a minimum, a CAD file (usually a STEP or IGES file) and a clear parts list showing every component, material, and finish. A short description of what the product does, your rough quantity, and your target timeline all help too. Clear information lets a manufacturer quote accurately and give you useful DFM feedback, while vague details lead to guesswork and delays. If you only have a sketch or a prototype, that's still enough to start a conversation.
Got a Prototype? Let's Talk About Making It Real
You've done the hard part, you have something you can hold. Meco can take it the rest of the way, from design tweaks and tooling to a small first batch and full production, all under one roof.
- No minimum order: Start with 10 pieces, not 10,000.
- Free DFM feedback with every quote: Simple design tweaks that often cut 15 to 30 percent off your cost.
- Your idea stays yours: We sign an NDA before we begin.
- One partner, start to finish: Prototype to finished, packaged product, no vendor juggling.
Send us your sketch, CAD file, or prototype and we'll come back with honest feedback and a quote, usually within 24 hours. No jargon, no pressure.
Request a Quote Today