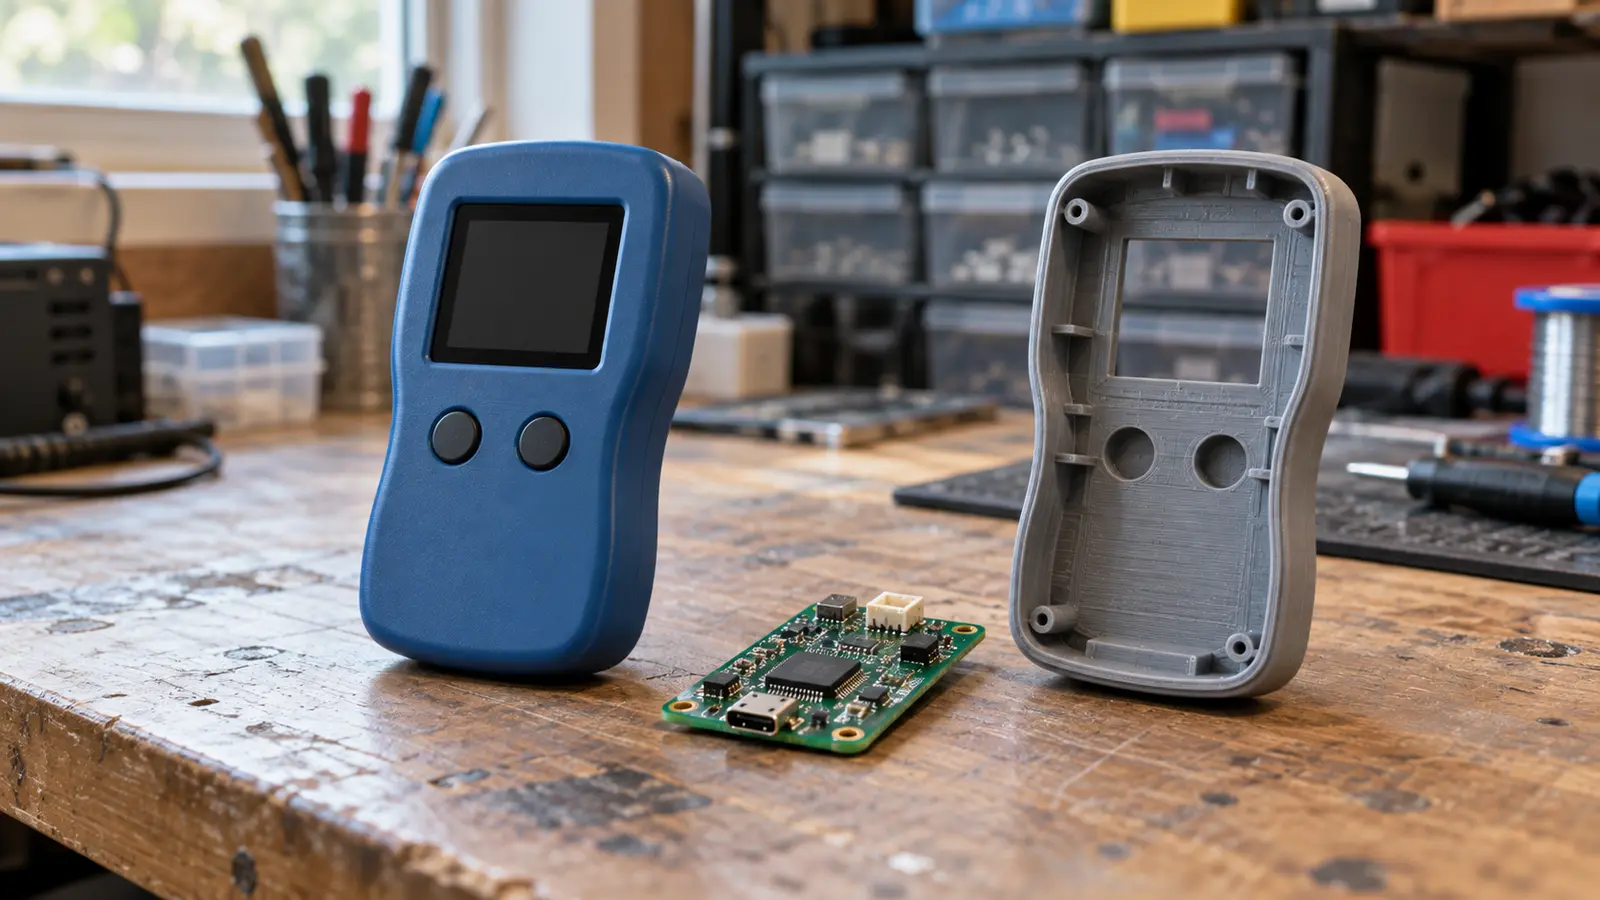
Prototype to production turns a working model into a product that can be made repeatedly through a production-ready design, a tooling decision, a pilot batch and controlled scale-up.
You do not always need a production mold for the first run. Machining, printing or bridge tooling can help prove the design and demand before a larger investment.
A working prototype is a major milestone, but there is still work between a model that functions and a product a factory can make repeatedly.
This guide covers the rest in plain English: realistic timelines, tooling costs, common design changes and how to start without ordering 10,000 units you do not need yet.
If you are planning a launch, the sections on how long it takes and what it costs explain the main decisions.
If you are still building your first model, making a prototype of your invention covers that stage. The full idea-to-shelf roadmap is explained in getting your invention made.
Moving from prototype to production is the later part of that journey, where a working idea becomes a repeatable product you can sell.
Key takeaways
- Production readiness. A working prototype still needs review for the final material and manufacturing process.
- Tooling. Buy a mold when the design, quantity and unit-cost savings justify it.
- Bridge production. A small first run checks the process before full-volume orders.
- Budget. Separate engineering, tooling and per-unit production costs.
- Launch planning. Include sample approval, product requirements, quality checks and realistic demand.
- Accountability. Coordinate the full build route rather than leaving supplier handoffs unmanaged.
What "Prototype to Production" Actually Means
A prototype proves the idea works. Production proves the design can be made repeatedly at the required quality and cost.
A design-for-manufacturing (DFM) review checks whether the design suits the process that will make it.
A prototype proves your idea works. Production proves it can be made over and over, affordably, without falling apart or looking different every time.
Those sound similar. They're actually two very different problems, and the gap between them is where most first-time timelines quietly slip.
Your prototype answers whether the idea works. Production asks whether it can be made a thousand times to the same specification, at a price that leaves a profit.
This guide explains how to cross that gap without wasting money.
The good news is you don't have to figure it out alone. This is exactly what a manufacturer does all day.
In fact, the single best time to bring one in is right now, while the design can still change cheaply, not after you've frozen everything. In our guide on getting an invention made, we call this whole back half of the journey the "Source, Sign-off, Scale" stages of Meco's First-Run Framework.
This post zooms in on those three moves.
The 4 Steps from Prototype to Production
Move through a production-ready prototype, a tooling decision, a pilot batch and a controlled scale-up.
The path is rarely a perfect straight line, but almost every physical product moves through the same four steps. Knowing what each step is for keeps you from skipping the ones that come back to bite you later.
| Step | What it's for | Typical quantity | How it's usually made | What trips people up |
|---|---|---|---|---|
| 1. Production-ready prototype | Prove it can be made, not just built by hand once | 1 to 10 | 3D printing, CNC machining | Design still built to "just work," not to be repeated |
| 2. The tooling decision | Pick the real process and decide if you need a mold yet | Planning stage | DFM review and quoting | Buying an expensive mold too early, or too late |
| 3. Small first batch | Get real, sellable units and catch problems early | 10 to a few thousand | Machining, soft tooling, short-run molding | Skipping it and finding defects at full scale |
| 4. Full production | Repeatable output at the lowest cost per unit | Thousands to millions | Hard tooling, casting, injection molding | Quality drifting, no plan to check quality |
Step 1: Make your prototype production-ready
This is the last version you build just to learn, and the first one you build with the factory in mind. Use materials and shapes close to what the real product will use, so the lessons actually carry forward.
The mindset shifts from "make it work" to "make it makeable."
CNC machining and plastic 3D printing can help build that final prototype without ordering a production mold.
Step 2: Decide if you need tooling
This is where a good manufacturer earns their keep, and where you decide whether your first batch is machined one part at a time or made from a mold. It's a bigger decision than it sounds, and we've given it its own section below because it drives your whole budget.
Step 3: Run a small first batch
A small first batch, often called a pilot run or bridge production, gets you real, sellable product while you make sure the full process works. It's the step first-timers skip most, and the one that catches problems before they multiply into a warehouse full of unsellable stock.
Step 4: Scale to full production
Only once that small batch comes out clean do you scale up. Now the focus turns to cost per unit and keeping quality consistent, which is where understanding the real cost of getting a part made pays off.
What makes a pilot batch useful?
Bridge production is a small run, often 10 to a few thousand units, before full mass production. It can use machining, printing or bridge tooling, depending on the part.
The purpose is to check the whole process, including fit, assembly, finish and inspection, before increasing the quantity. Units can be sold only when the applicable product requirements and release checks have been met.
What changes between a prototype and a production part?
A prototype may be hand-built or printed as a one-off to prove the idea. A production part has a defined material, tolerance, shape and process so it can be made repeatedly to the same specification.
That is why the production design may differ from the original model even when the intended function stays the same.
Why Your Prototype Won't Survive Production (The Redesign Trap)
A working prototype may need design changes before it can be manufactured consistently.
Discovering that after tooling has been ordered can add cost and delay a product that already works. Reviewing the production process while the design can still change helps avoid that redesign trap.
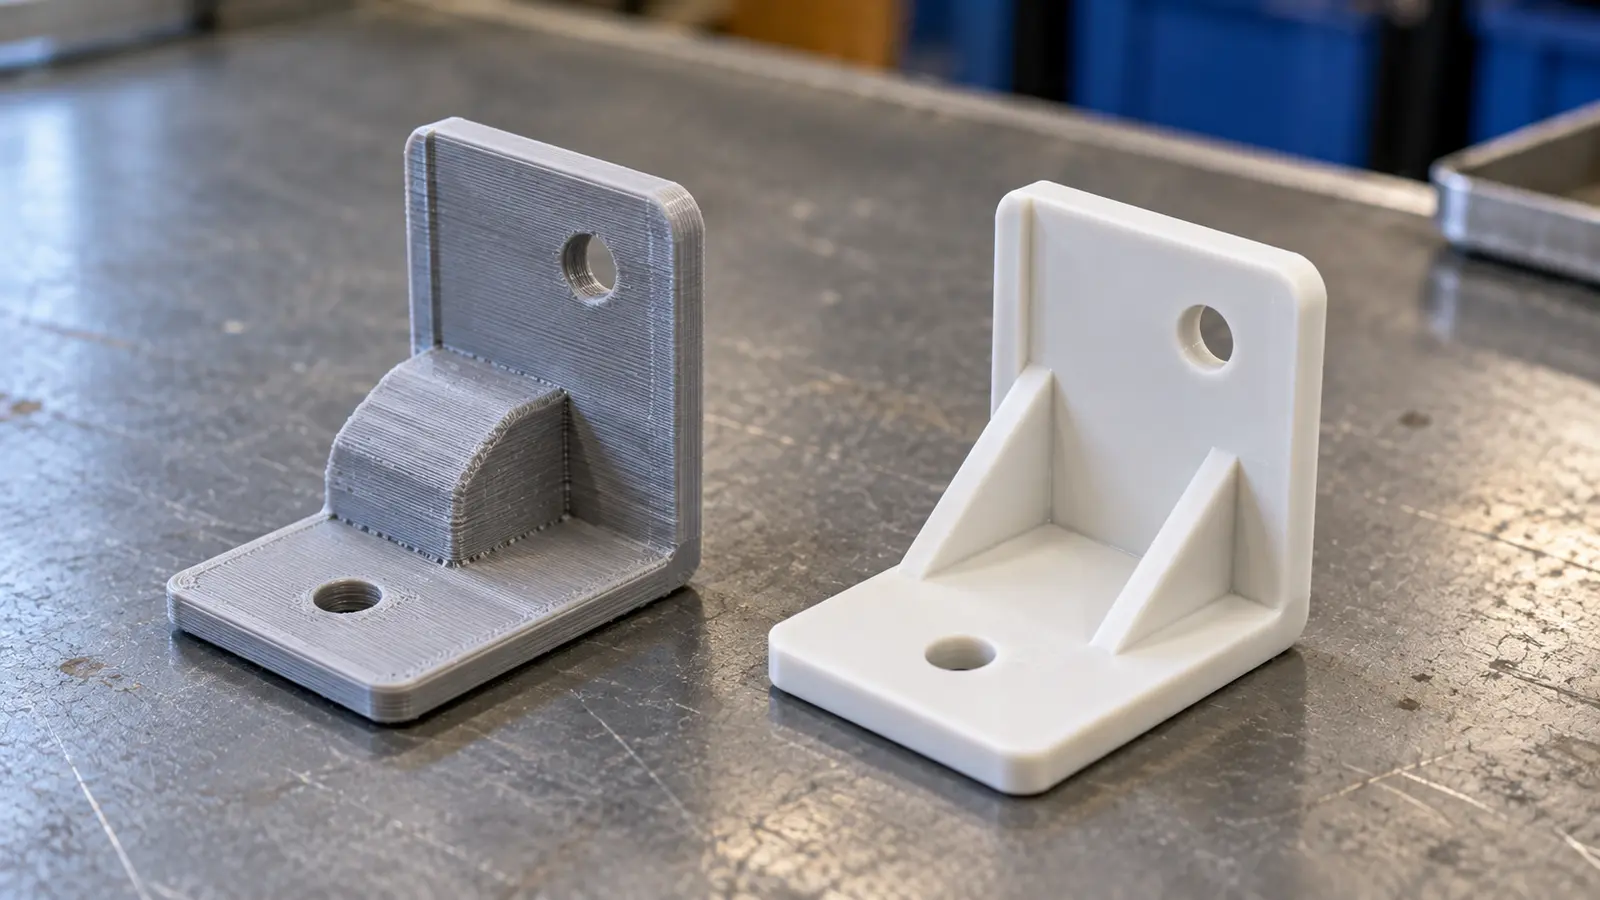
For example, suppose you 3D-printed a plastic bracket with one wall 3 mm thick and another 8 mm thick. It works as a prototype, but the design has not yet been checked for injection molding.
A printer builds up layers, while molding fills a cavity and cools the resin. Thick and thin sections can cool and shrink at different rates.
The thicker section may leave a dent called a sink mark as it shrinks. Uneven cooling can also cause warpage, affecting how the bracket fits or works.
One possible redesign is to make the walls a more uniform 3 mm and add ribs where the thick section previously provided strength. This keeps the same intended function while reducing unnecessary material.
The correct wall and rib dimensions depend on the resin, loading and mold layout. They need a DFM review, rather than a guarantee that a 3 mm wall will mold well in every case.
These are changes that are usually cheaper to make in the design file than after a mold has been cut.
The design changes that surprise almost everyone
- Draft angles: Molded and cast parts need slightly tapered walls so the part can pop out of the tool. Prototypes almost never have them.
- Even wall thickness: Thick and thin sections in the same part cause warping and those ugly dents called sink marks.
- Parting lines: Every mold has to split somewhere. Where it splits affects how your product looks and works, so it gets planned on purpose.
- Splitting or combining parts: One printed piece might need to become two molded pieces, or several prototype pieces might merge into one.
- Realistic tolerances: You can hand-fit a prototype. Production needs measurements the machine can actually hit every single time.
Which rules apply depends on what your product is made of. If it's headed toward metal, the custom casting process has its own draft and gating rules.
If it's molded plastic, injection molding brings wall-thickness and shrinkage into play. This is exactly what a design-for-manufacturing (DFM) review is for, an engineer looks at your design and flags all of this before you spend a cent on tooling.
The good news is these fixes almost always make your part cheaper to build, not more expensive.
Do You Even Need Tooling Yet? The Big Money Decision
You need tooling when the chosen process, expected volume and unit-cost savings justify the upfront cost.
Tooling, meaning the custom mold or die that shapes your part, is usually the single biggest cost in reaching production. So the real question isn't "how do I get tooling," it's "do I need it yet?" The answer decides your whole budget.
The rule of thumb is simple. At small quantities, you skip tooling and just machine or 3D-print each part.
As your numbers climb, a mold starts to pay for itself because each part gets much cheaper to make. Between those two extremes sits a middle option a lot of first-timers have never heard of: soft tooling.
Meco's R&D engineering workflow connects product design, sampling, pilot runs and volume production. The process choice should follow the design and launch needs.
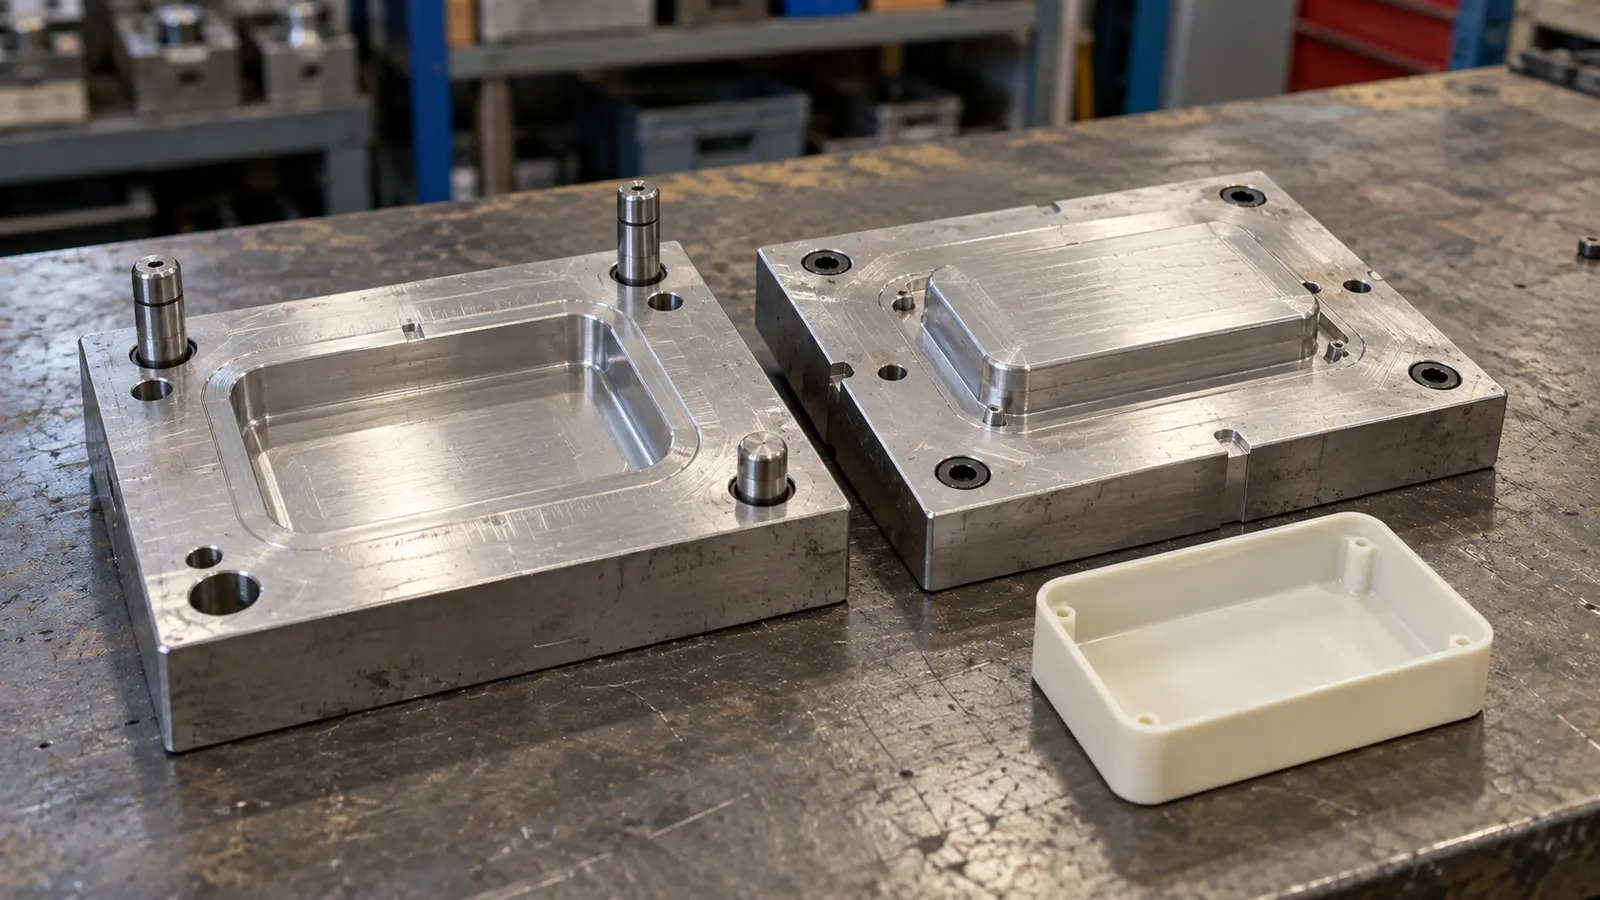
Soft or bridge tooling often uses aluminum instead of hardened steel. It can cost less and take less time to produce than a full production tool.
It also lets you make molded parts in the intended material. A few hundred or a few thousand units can help confirm the design and demand before a larger steel-tool investment.
That is the bridge between making each part individually and committing to full production tooling. Soft tooling can also use other constructions, including softer steel, depending on the process and part.
| Your approach | Best when you need | Rough tooling cost | Why you'd pick it | The trade-off |
|---|---|---|---|---|
| Machine or 3D-print each part | 10 to a few hundred | No mold; fixture and setup costs may apply | No mold to wait for, easy to change the design | Each part costs more |
| Soft / bridge tooling (aluminum) | Hundreds to a few thousand | About $2,000 to $8,000 | Real molded parts, faster and cheaper to make the mold | The mold wears out sooner than steel |
| Soft-steel production mold | Thousands | About $8,000 to $25,000 | A good balance of mold life and cost | Bigger upfront commitment |
| Hard-steel production mold | Tens of thousands and up | About $20,000 to $80,000+ | Lowest cost per part at big volumes | Most expensive to buy, hardest to change later |
Budget note. Tooling and production figures are representative planning ranges, not quotations. The final cost depends on the drawing, material, quantity, finish and required checks.
Those are typical public ranges for plastic injection tooling, and they shift with the size and complexity of your part. Casting molds follow different numbers.
But here's the point worth tattooing on your brain as a first-timer: you do not have to buy the expensive mold first. Because Meco has no minimum order quantity, you can start with 10 pieces, prove the design is right, and only step up to tooling once your sales actually justify it.
That single fact removes most of the financial fear from this whole stage.
How Long Does It Really Take? (The Honest Answer)
A simple single-part product may reach production in a few weeks, while a complex product can take several months or longer.
The schedule depends on the design, tooling, sample approval, testing and production route. A firm launch promise for a complex product needs that information first.
A quote should explain the timeline range and what could move it. That gives you a more useful planning basis than a fixed date offered before the files have been reviewed.
The reason you can't just rush it is tooling. Cutting a mold is a physical process with real steps that take real time, and no amount of hustle shrinks it below a certain floor.
Here's what the pieces actually add up to.
| Step | How long it usually takes |
|---|---|
| Quote and DFM feedback | Under 24 hours to a few days |
| Prototype parts | 1 to 2 weeks (3D-printed, often 3 to 7 days) |
| Injection-mold tooling | 2 to 8 weeks |
| Casting tooling | 4 to 14 weeks |
| Forging dies | 6 to 12 weeks |
| Sample approval and inspection | 1 to 2 weeks |
| Overall (simple single part) | 2 to 8 weeks |
| Overall (complex multi-part product) | Several months up to 12 to 18 months |
Check the assumptions behind a launch date
If a product has a dozen parts, needs safety checks and has not been tested for durability, tooling may take two to three months before sample and pilot work are complete.
The schedule also needs time for design changes, sample approval and the first batch. Ask what the date includes and which approvals or revisions could change it.
A four-month plan can be realistic for some projects. It becomes unreliable when offered without knowing the design or requirements.
Two scheduling practices help reduce avoidable delays:
- Run suitable steps in parallel. For example, tooling for an approved part may proceed while another part is finalized. Confirm interfaces and revisions before committing to any dependent tool.
- Include the pilot batch. Treat the small first run as part of the plan. It checks the complete process before problems multiply at full production volume.
How Much Does It Cost to Go from Prototype to Production?
Prototype-to-production costs fall into engineering, tooling and the cost of making each unit.
- Engineering and design. Production drawings, material choices, DFM changes and testing.
- Tooling. Molds, dies and fixtures needed for the chosen process.
- Per-unit production. Materials, conversion, finishing, assembly and packaging.
Tooling is often the main one-time expense. Per-unit cost can fall as volume grows, which is why a mold can make financial sense once the design and demand are stable.
The metal part manufacturing cost guide gives a fuller pricing breakdown.
Meco's DFM reference identifies potential cost reductions of 15 to 30%. The result depends on the starting design and the changes available.
An engineer may spot a feature that adds machining, tooling or assembly cost and suggest a simpler version with the same required function. Early feedback allows that change before the design is locked.
The no-minimum-order approach also limits how much cash you commit before demand is clear. A huge first order may lower the unit price, but it ties up money in stock.
Start with a small batch to see what sells. With real sales behind you, increase the quantity and move toward lower per-unit costs.
You get useful market feedback before making the larger investment.
Ready to plan the first run? Share your prototype, drawing or sketch, expected quantity and target launch date. An engineer will review the production route and advise on the next step.
Talk to an EngineerThe Hidden Steps First-Timers Always Miss
Plan the product requirements, parts list, quality checks and expected demand before launch.
Beyond design and tooling, a few steps sneak up on almost everyone making their first product, usually at the worst possible moment. Planning for them now is far cheaper than tripping over them at launch.
- Certifications and safety approvals. Check the requirements for your product and target market early. Testing, labeling or certification may be needed before sale. For U.S. consumer products, the CPSC business education resources help identify applicable requirements. Include the right tests and documents in the launch plan rather than discovering them after production.
- A complete parts list (bill of materials). Every component, material, and finish, written down clearly. Vague entries like "a screw" or "plastic" lead to wrong quotes and delays. The clearer your list, the more accurate your quote.
- A plan to check quality. As you make more units, you need a way to confirm they're all coming out right, not just the first one. This is where working with an IATF 16949:2016 certified manufacturer helps, quality checks are built into every stage from raw material to the finished product, so consistency isn't left to luck.
- An honest guess at demand. Order too few and each unit costs more; order too many and your cash is stuck in a warehouse. Starting small and scaling with real sales is how you sidestep both.
One Partner vs. Juggling Five Vendors
One accountable partner can reduce handoffs between design, tooling, component production, assembly and delivery.
A first-time product budget can suffer when each stage has a separate supplier. One company builds the prototype, another makes the mold, and others supply plastic parts, metal parts and assembly.
Each choice may seem reasonable on its own. Together, they add coordination work.
When something does not fit, it can take time to establish which supplier must fix it and who pays. The product owner carries that delay unless responsibilities are clear.
Small orders spread across several suppliers can also be harder to schedule. A delay at one supplier may leave the next stage waiting.
That is why capacity, priorities and lead times should be agreed across the complete route, rather than assuming every supplier will move at the same pace.
A manufacturer that coordinates its own processes can connect design, tooling, parts, product assembly and delivery through one point of accountability.
That is the basis of Meco's whole product manufacturing approach: one partner coordinates the move from prototype to finished, packaged product.
Meco can sign an NDA before you share any drawings or files. Your design and tooling stay yours, and Meco does not produce your product for anyone else.
You may transfer your design and tooling to another supplier. You are responsible for the expense and arrangements of that transfer.
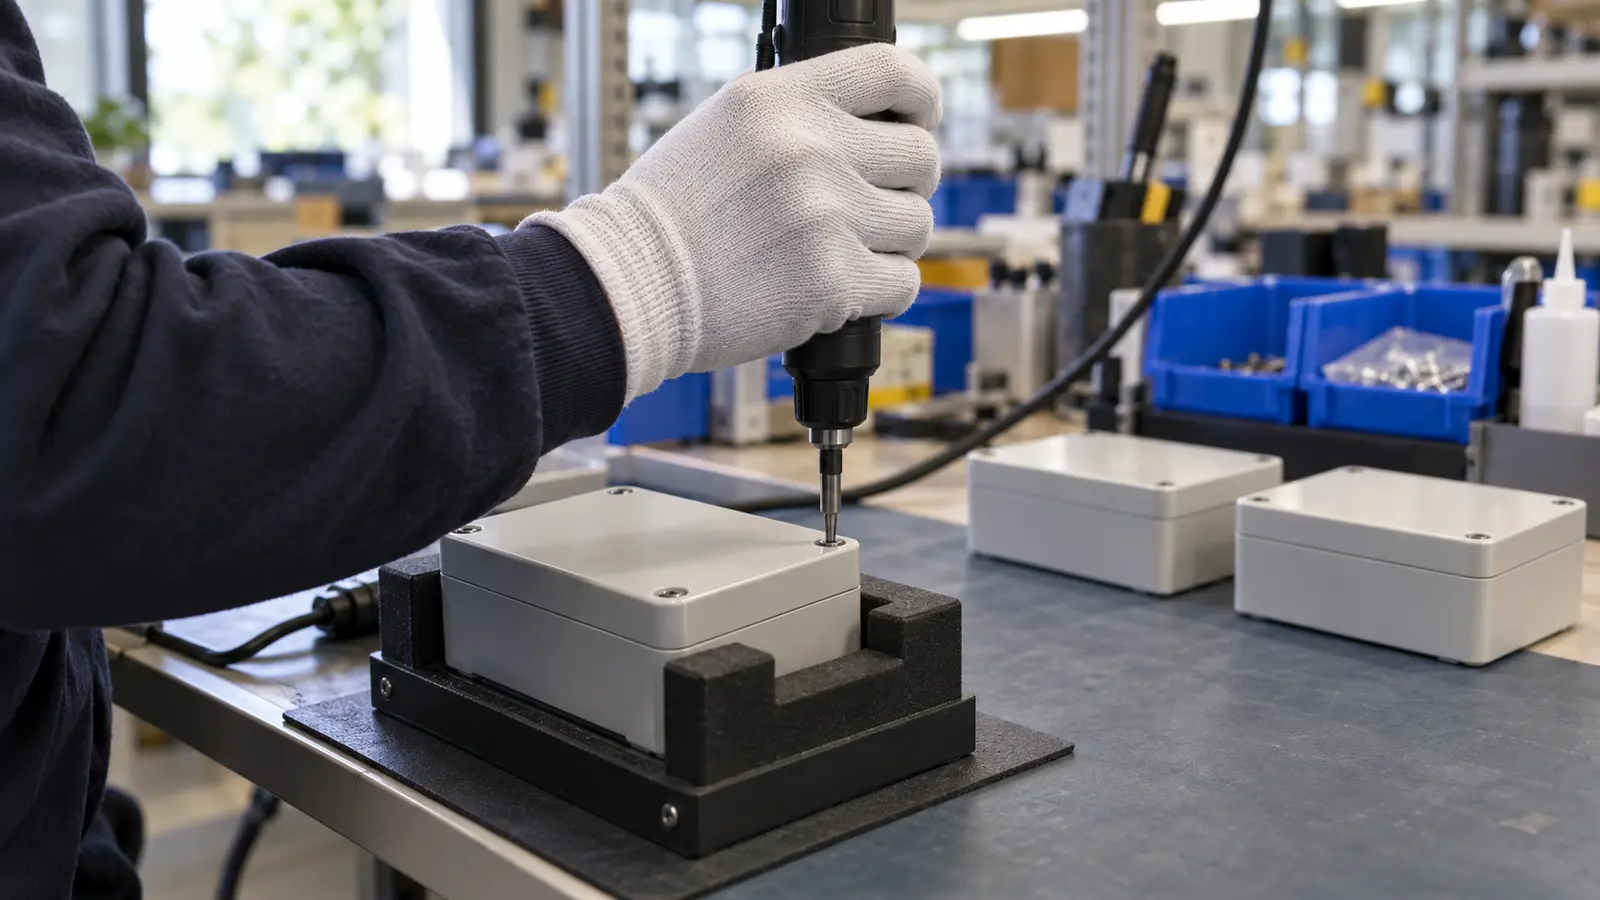
In our experience, the biggest money-saver for a first-time product creator isn't finding a cheaper factory. It's having one team that catches design problems before they become production problems, and that will run a small batch instead of forcing a giant one.
If you want to understand how this business relationship works before your first call, our explainer on what contract manufacturing is is a good five-minute read.
Your Simple Prototype-to-Production Checklist
Review the design, choose the process, prove the first batch and approve the build before scaling.
If you take one thing away from this guide, let it be the order of operations. Doing these in sequence is what keeps the whole thing affordable.
- Make your prototype production-ready, real materials, real shapes, factory in mind.
- Send your files to a manufacturer and get DFM feedback before you commit to anything.
- Decide with them whether to machine your first batch or invest in soft tooling.
- Run a small first batch and actually inspect it.
- Sort out any certifications your product needs to be sold.
- Approve a sample, then scale up into full production and cheaper per-unit pricing.
None of these steps require a manufacturing background. They just require doing them in the right order, and picking a partner who'll walk them with you instead of handing you a price and disappearing.
Take Your Prototype to Production
Share your sketch, CAD files or prototype with Meco. An engineer will review the design, tooling options and first-run requirements.
- No minimum order. Small first batches
- DFM feedback. Review before tooling
- Your design stays yours. NDA before file sharing
- One partner. Components, assembly, packaging and delivery
References and sources
- U.S. Consumer Product Safety Commission. Business education resources. Product requirements, testing, certification and labeling. Checked 7 October, 2026.
Cost and lead-time figures are representative planning ranges, not quotations or promised launch dates. Product requirements depend on the product and target market.
